„Beállítások” változatai közötti eltérés
A (→2D) |
|||
| Sor 195: | Sor 195: | ||
==== Hagyományos 3D headset ==== | ==== Hagyományos 3D headset ==== | ||
Csak az eddig még nem említett beállítások listája: | Csak az eddig még nem említett beállítások listája: | ||
| − | |||
'''HUD igazítása:''' [0.000 - 0.100] <br> | '''HUD igazítása:''' [0.000 - 0.100] <br> | ||
2015. július 30., 08:46 változat
FORDÍTÁS ALATT
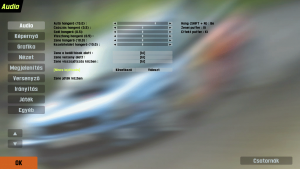
Hang
Ez a menü lehetőséget ad a zene és más hangok hangerejének beállítására.
Autó hangerő:
Az autó összes hangjának hangerejét szabályozza. Ha reccsegő hangokat hallasz a játékban, csökkentsd ez az értéket. Alapértelmezett az S2 X verzió óta: 15.0.
Csúszás hangerő:
Sokszorozza a realisztikus csúszás hangerejét, hogy jobban lehessen hallani. Állítsd 0.0-ra a 'realisztikus' hangerőért, és 1.0-ra a 'fokozott' hangerőért. Alapértelmezett az S2 X verzió óta: 0.5.
Szél hangerő:
A szél hangerejét szbályozza. Jegyezd meg, hogy attól függetlenül, hogy hogyan állítod be ezt az értéket, a nyitott autókaban sokkal jobban fog hallatszani a menetszél, mint a zárt autókban. Az alapértelmezett és a 'realisztikus' beállítás 0.0. Alapértelmezett az S2 X verzió óta: 0.5.
Visszhang hangerő:
A visszhang effekt hangerejét adja meg. Az alapértelmezett értéknek 0.0 realisztikusnak kellene lennie, de természetesen beállíthatod ezt is, ahogy neked tetszik. Bár, a magasabb értékek növelik a reccsegő hangok esélyét a játékban. Alapértelmezett az S2 X verzió óta: 0.5.
Zene hangerő:
A menő és a játékban hallható zene hangereje. Alapértelmezett az S2 X verzió óta: 5.0.
Kezelőfelület hangerő:
A kezelőfelület hangerejei, mint például a gombok klikkenése, stb. Alapértelmezett az S2 X verzió óta: 10.0.
Zene a beállítások alatt:
A beállítási részeknél kapcsolja a zenét be vagy ki.
Zene verseny alatt:
A verseny alatti zenét kapcsolja be vagy ki.
Zene visszajátszás közben:
A visszajátszások alatti zenét kapcsolja be vagy ki.
Zene választás:
A 'Következő' és a 'Választás' gombok használatával ki tudod választani, milyen zene szóljon.
Zene játék közben:
Az LFS támogatja a lejátszási listákat. Itt láthatod, melyik lejátszási lista van éppen használatban. A 'Következő' gombbal át tudsz ugrani egy számot és 'Választás' gombbal ki tudsz választani egy zeneszámot.
Csatornák:
A csatornák gomb használatával belépsz a lejátszási listák kezelőfelületére, ahol létre tudsz hozni vagy át tudsz csinálni egy-egy listát. Az 1-es csatorna az alap az összes beállítási résznél, és nem lehet kitörölni. Hozzá tudsz adni, átnevezni és kitörölni a lejátszási listát az oldal bal felén. A jobb oldalon hozzá tudsz adni zeneszámokat és kitörölni őket. Ahhoz, hogy minden egyes szám le legyen játszva, be kell állítanod a számok prioritását (3 a legmagasabb, 1 a legalacsonyabb prioritás – ez a beállítás (1) megelőzi az adott számot a lejátszástól). Minél magasabb egy szám prioritása, annál nagyobb az esélye hogy újra le lesz játszva.
MEGJEGYZÉS: Az LFS hang-fájljai OGG Vorbis formátumban vannak. Átalakíthatod a saját zenéidet egy freeware enkóderrel, ami elérhető itt: www.vorbis.com vagy itt: Audacity. Ahhoz, hogy le tudd játszani a zenéidet az LFS-ben, ide kell őket tenned: LFS_MAPPA\data\ogg.
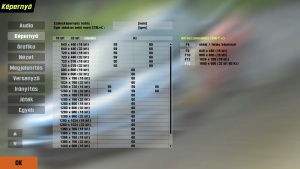
Képernyő
Ebben a menüben ki tudod választani az általad kívant felbontást, színmélységet és frissítési gyakoriságot, valamint felbontásokat hozzárendelni egy-két gombhoz/billentyűhöz.
Szélesképernyős hatás:
Ez szimulálja a hatást, amikor egy filmet nézünk egy hagyományos, 4:3 TV-n egy fekete sáv kijelzésével a kijelző tetején és alján.
Az egér ablakon belül marad (CTRL+C):
Ha ablak-módban használod az LFS-et, hozzácsatolhatod az egér kurzort a LFS ablakhoz. Ez nagy problémát tud jelenteni annak, aki az egérrel irányítja az autót. Ez a beállítás nem engedi ki az egeret az LFS ablakából. Ez aktiválható és deaktiválható Ctrl+C kombináció megnyomásával.
Bill. hozzárendelés:
Ez megengedi azt, hogy hozzárendelheted az általad kívant felbontást, színmélységet és frissítési gyakoriságot egy billentyűre a 4 elérhető közül: Shift+F9-től Shift+F12-ig. Csak válaszd ki a kívánt beállítást és klikkelj az egyik billentyűre a jobb oldalon.
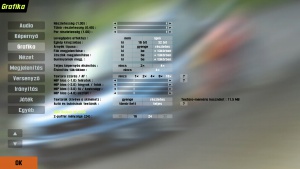
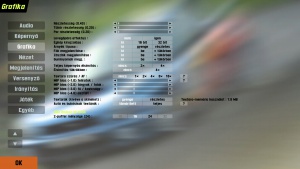
Grafika
Itt irányíthatod a grafikai részletességet a játékban. Ezek opciók finomhangolása megemelhetik az FPS-t, vagy javíthatják a kép-minőséget. Valamely opciók kikapcsolvásával javítani tudod a játékélményt régebbi számítógépeken.
Részletesség:
A tárgyak, textúrák részletességét és távolságot állítja be. Pl. A gumik szögletesnek fognak látszani, ha ez alacsony beállításon van.
Teljesítmény: 0.25 | Minőség: 1.00
Tükör részletesség:
A tükörben lévő kép részletességét állítja be.
Teljesítmény: 0.20 | Minőség: 0.30
Por részletesség:
A por és a füst részletességét állítja be.
Teljesítmény: 0.25 | Minőség: 1.00
Levegőpára effektus: [nem / igen]
A levegőpára effektust kapcsolja be vagy ki. Ha be van kapcsolva, a messzi tárgyak egy vékony réteg köd vagy homály mögött vannak kirajzolva, növelve ezzel a mélységérzetet. Ahogyan az égkép kirajzolásánál is, ennek kikapcsolása csak nagyon régi számítógépeken növelheti a teljesítményt.
Égkép kirajzolása: [ki / 16 bit / 32 bit]
Beállítja, legyen-e rajzolva égkép vagy sem, és ha igen, az 16 vagy 32 bit felbontású legyen. Ennek kikapcsolása csak nagyon régi számítógépeken növelheti a teljesítményt.
Árnyék típusa: [ki / gyenge / részletes]
Beállítja az árnyék típusát az autóknál. A 'ki' teljesen kikapcsolja az árnyékokat, a 'gyenge' kirajzolja az árnyékokat, de csak kis felbontáson, hogy növelje a teljesítményt, a 'részletes' teljes részletességű árnyékokat jelenít meg. A közepes vagy akár (a mai színvonalhoz képest) a gyengébb számítógépeknek nem kellene, hogy problémájuk legyen a részletes beállítással.
Fák megjelenítése: [ki / be / + tükörben]
Beállítja, hogyan legyenek a fák kirajzolva. Csak azokra a fákra érvényes, amit mozognak, ha a szél engedélyezve van.
Zászlók megjelenítése: [ki / be / + tükörben]
Beállítja, hogyan legyenek a zászlók megjelenítve a pálya körül. Ezek pl. a szél írányának megállapításához lehetnek szügségesek. Egy kicsit csökkenti a teljesítményt, egyébként ugyan az a logika vonatkozik erre is, mint a 'Fák megjelenítése' opcióra.
Guminyomok megjelenítése: [ki / be / + tükörben]
Beállítja, legyenek-e guminyomok a földön. Általában egy kicsit csökkenti a teljesítmény egy normális verseny alatt, az egyetlen kivétel, ha nagyon sok guminyom van kirajzolva a földön egy kis területen.
Teljes képernyős élsimítás: [nincs / 2x / 4x / 8x]
Elsimítja az éleket. Nagy hatással van az FPS-re. Erősen ajánlott, ha a te rendszered képest ezt kezelni. Illusztráció: ITT (Aliased - nincs élsimítás, Anti-Aliased - van élsimítás)
Élsimítás tükrökben: [nincs / 4x]
Elsimítja az éleket a tükrökben. Erősen ajánlott, ha a te rendszered képest ezt kezelni.
Textúra szűrés / AF: [nincs / 1x / 2x / 4x / 8x / 16x]
MIP bias ... feliratok:
MIP bias ... tárgyak / falak:
MIP bias ... fű / kavicságy:
MIP bias ... aszfalt:
Egy '?' az opció mellett részletesebben elmagyarázza, mit csinálnak ezek a beállítások.
Röviden, egyfajta elhomályosító hatás van érvényben egy távolságon (ezt állítják be a csúszkák).
Textúrák (kivéve a skineket): [gyenge / részletes]
Beállítja, hogy egy textúra teljes méretében, vagy lekicsinyített formában legyen használatban. A 'gyenge' kiválasztása jelentősen csökkenti a textúrahasználatot, és segít megnövelni a teljesítményt a régebbi videókártyákon.
Autó- és bukósisaktextúrák: [tömörített / teljes]
Beállítja, hogy az autó- és sisak-textúrák tömörítve legyenek, vagy teljes minőségben kerüljenek használatra. A tömörítés használatakor csökken a skin minősége, de jelentősen meg tudja növelni a teljesítményt, amikor sok autó van a képernyőn.
Z-puffer mélysége: [15 / 16 / 24 / 32]
Beállítja, milyen nagy a csúcs-mélységi puffer videókártya által használva. Minél nagyobb ez az érték, annál több mélységi információ lehet elraktározva. Nem az összes érték élérhető az összes grafikai kártyán. A legjobb ötlet: egyszerű a legmagasabb értékre tenni, amire lehet.
Nézet
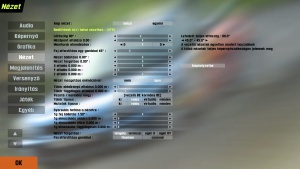
Ezen az oldalon beállíthatod a játékbeli kamera helyzetét, nézetét és látószögét. Mivel a legfontosabb az, mit látsz a játékban, ajánlott egy személyreszabni ezeket a beállításokat. Nézzük a beállításokat fentről lefelé. Érdemes megjegyezni, hogy a 'Gyorsulás hatása a nézetre' szakaszig lévő beállítások minden autóra külön tárolódnak.
2D
Alap nézet: [belső / egyéni]
You can have 2 static cameras in-game, either the standard view which is the most realistic, or the custom view which can be placed anywhere. How to set up a custom view will be explained later on. Selecting one of these here will result in that being the standard view which is selected automatically when you start up LFS, at the beginning of races and can be accessed by pressing SHIFT + F1. Select the view here which you will be using most of the time, in car or custom.
Látószög:
The width of the view you are presented in game, also known as the amount of zoom. A smaller field of view will result in a closer look at what's in front, but will show less of what's beside you which is also important. A larger field of view will result in good view around you but a distant view what's in front of you. It's up to you to define a balance here, try and adjust the slider till it comforts you. The default value is around 90°.
Nézőpont eltolása: [-0.75 - 0.75]
Monitorok elrendezése: [max 5 balra - max 5 jobbra]
Fej elfordítása egy gombbal: [30° - 90°]
Nézet bólintása:
The vertical direction of the camera can be selected here, it can aim upwards with a positive value, or it can aim downwards with a negative value.
Nézet forgatása:
The horizontal direction of the camera. It can aim left with a negative value or aim right with a positive value.
X, Y és Z eltolások:
Nézet mozgatása animációval: [nem / igen]
This option allows you to select whether the in-car camera moves along with the driver when it steers left and right, which does look realistic, but it's personal whether it should be on or off.
A tükör oldalirányú és függőleges eltolása:
Adjusting these will position the front mirror horizontally (mirror offset lateral) and vertically (mirror offset vertical). Make sure it's visible as it's useful tool to notice cars behind you.
Vezető / kormány megjelenítése:
This changes what you see in the in-car view. The driver with the steering wheel, only the steering wheel, or nothing at all. Some people who use a steering wheel in LFS are known to use display no steering wheel in LFS because it looks awkward seeing a steering wheel move the same as the one you are controlling.
Tükör típusa: [ki / valós / virtuális / minden]
Sets how mirrors are rendered. 'Off' disables mirrors, 'real' shows the image on the car's mirrors, 'virtual' displays a artificial mirror in the top middle of the screen and 'all' combines real and virtual mirror modes.
Mutatók típusa: [ki / valós / virtuális / minden]
This defines how the car's gauges and meters are displayed. 'Off' displays nothing, 'real' shows them on the car's dashboard, 'virtual' shows them on your display and 'all' shows them both on dashboard and display.
A 'Gyorsulás hatása a nézetre' beállítások:
These options define how much the standard view and the custom view is shifted and tilted with the G forces. With all of these options set to 0, the camera remains statically at its position. As a human head and body moves along with G forces applied to it, the head and thus view moves along as well. For a realistic setting, set these options between 0 and 50% of their maximum value.
Nézet forgatása: [tengely / kormányzás / egér X / egér XY]
With this option, you can set up additional ways to look left and right beside the look left and right buttons. The Axis option will move the camera left and right with an axis specified in the Controls menu. Read that to get to know how to set an axis for the axis look option. The steer option will move with your steering. Steering left will result in the camera moving left as well. This can be pretty useful as when you steer left, you will want to go in that direction and a view looking into that direction shows more of what to come. The amount the camera looks into the steering direction can be adjusted with Look sensitivity. To find a good value for the sensitivity, steer all the way to one side and adjust the Look sensitivity to what is the maximum allowed amount of movement to one side. Ms X will move the camera left and right along with the mouse. Look sensitivity does the same as described above. Look centre reduction will allow you to define how easily the camera should stay in the forward looking position. Setting it at a high value will result in having to move the mouse a lot to move it out of the forward looking position. At a low value, it will move exactly like the mouse with no centre movement reduction. Ms XY does the same except the camera moves up and down with your mouse as well, making it more adjustable.
Fej elfordítása gombbal: [finoman / azonnal]
Setting this option will define how the camera should look left and right when you press the Look left and Look right buttons specified in the Controls menu. Smooth will pan the camera gently to the side when you press the button, instant will show you the side immediately without movement.
Egyéni kamera beállítása
(Note: every custom camera you set up is saved per car. This way you can make a different custom camera in every car.)
Go to the View options and click on custom in the Default driver view option. Notice that new options are available now called Settings for custom view and have changed a little.
Az X, Y és Z eltolások:
The most important settings of a custom view, define the custom camera's position. X offset moves the camera left and right, Y offset moves the camera forwards and backwards and Z offset moves the camera up and down. If you adjust this while the car is on track, two extra buttons will appear, namely 'Centre view' and 'Eye position'. Clicking the former will reset the offsets to 0.0, while pressing the latter will set them to the values similar to what you see in in-car view.
Megjelenítés (alapból): [semmi / kerekek / minden]
Sets how the car around you should be drawn. 'None' means nothing is drawn, 'wheels' draws - you probably guessed it - only the wheels and 'body' draws the whole car interior.
Gyorsulás hatása a nézetre: [igen / nem]
This extra option to turn off the viewpoint shifting under acceleration allows you to have a fixed camera for custom view, while still allowing a moving camera for the in-car view.
When you are done setting up a custom camera, click in car again in the Default driver view option if you want the default view to be used as the standard view. Though, if you are happy with the new custom view, keep it on custom so it will always be used as the primary view.
3D
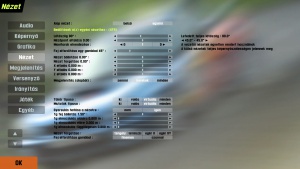
TV / monitor / projektor
3D kimenet formátuma: [egymás alatt / egymás felett, felezett / teljes]
Vízszintes képernyőszélesség: [200 mm - 8000 mm]
Pupillatávolság: [55 mm - 75 mm]
HUD képaránya: [1:1 / 4:3 / 16:9]
Hagyományos 3D headset
Csak az eddig még nem említett beállítások listája:
HUD igazítása: [0.000 - 0.100]
Oculus Rift
Csak az eddig még nem említett beállítások listája:
Prediktív követés: [0 ms - 20 ms]
Élsimítás: [igen / nem]
Képarány korrekció: [igen / nem]
HUD látószöge: [75° - 115°]
HUD távolsága: [0.400 - 3.600]
Függőleges látószög: [90 - 120 / automatikus]
Nézet gombok
V : Váltja a kameranézetet.
SHIFT + V : Váltja a kameranézetet, visszafelé.
TAB : A következő autóra váltja a nézetet.
SHIFT + TAB : Az előző autóra váltja a nézetet.
HOME : A saját autódra váltja a nézetet.
SHIFT + F1 : Visszaállítja az alapértelmezett nézetet, ami a beállítások Nézet lapján van beállítva.
SHIFT + F : Eltünteti a HUD-ot (minden feliratot a kijelzőről).
SHIFT + M : A tükör módját váltja. [ki / valós / virtuális / minden]
SHIFT + U : Bekapcsolja az autocross szerkesztőt/szabad nézetet.
Megjelenítés
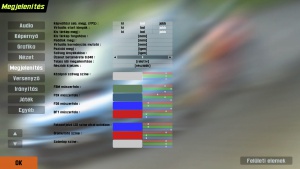
Itt megváltoztathatod a mutatók kinézetét, a tükör típusát vagy a pályán lévő helyzeted kijelzését.
Képváltási sebesség megjelenítése (FPS): [ki / bal / jobb]
Megadhatod, melyik oldalon szeretnéd látni a FPS-t, ha egyáltalán szeretnéd látni.
Virtuális start lámpák: [ki / bal / jobb]
Ez virtuális start lámpákat helyez a kijelződre a rajt alatt. Ez segíthet, ha nagyobb rajtrácsok végéről indulsz, ahol a start lámpák már nehezen láthatóak.
Kis térkép megjelenítése: [ki / bal / jobb]
Az áttekintő térkép helyzete.
Kis térkép forgatása: [Igen / Nem]
Az előbbi térkép forgatását szabályozza. Ha Igen, a te autód (a kis zöld háromszög) mindig felfelé fog mutatni, ha Nem, a térkép stabil marad.
Pedálok megjelenítése: [Igen / Nem]
Engedélyezi vagy letiltja a pedálok helyzetének mutatóját a jobb alsó sarokban. Ez hasznos lehet, ha kalibrálási problémákkal küzködsz, mert láthatod a pedál teljes lenyomásánál, hogy a játék a pedál 100%-át, vagy csak egy részét "érzi", ismeri fel. A vékony fehér csík a pedálmutatók tetején jelzi, ha 100% a kontroller bemenete. A sávok színei: Zöld = gáz, Piros = fék, Kék = kuplung, Szürke = kézifék.
Virtuális kormányzás mutató: [Igen / Nem]
Engedélyezi vagy letiltja a kormány helyzetének mutatóját a képernyő alsó részében. Ez egy görbe fehér vonal, ami a piros téglalappal mutatja, hogy áll épp a kormány. Segíthet abban, hogy megállapítsd, helyesen van-e a kormány bekalibrlva.
Pozíció megjelenítése: [Igen / Nem]
A versenyben lévő versenyzők jelenlegi sorrendjének mutatása a jobb alsó sarokban.
Szöveg árnyékolása: [Igen / Nem]
Nyilvánvaló.
Üzenet betűmérete:
Minden szöveg mérete. Alapértelmezett: 0.040
Teljes idő megjelenítése: [relatív / abszolút]
A verseny végeredményének kijelzésére van hatással. Beállítja, hogy a mindenki teljes idejét, vagy a győzteshez viszonyított lemaradását mutassa. Az 'abszolút' beállításon így nézne ki:
- AI 1: 3:05.27
AI 2: 3:07.56
AI 3: 3:11.46
ugyan ilyen idők mellett a 'relatív' beállítás eredménye:
- AI 1: 3:05.27
AI 2: +0:02.29
AI 3: +0:06.19
Színek:
A műszerfalak színei állíthatók be. Több elem a 'Felületi elemek' részben állítható be.
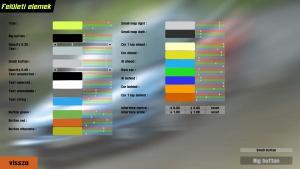
Felületi elemek:
Ebben a részben a szimulátorban szereplő betűk és szövegek színét, átlátszóságát állíthatod be.
Felületi elemek
Big opacity:
This controls the opacity (transparency) of the large buttons, e.g. on the main menu.
Big colour:
The underlying colour of the main buttons.
Big text:
The colour of the text (not affected by opacity).
Button opacity:
Affects smaller buttons.
Button colour:
Affects smaller buttons.
Text unselected:
The colour of text on menus where highlighting occurs (e.g. options or garage).
Text selected:
The selected colour of text, as above.
Text unavailable:
Visible text that cannot be selected.
Text string:
Used on some buttons with user-editable text (like hostname or password), or for example for available but not yet completed training lessons.
Title colour:
The colour of the text in the top left of the menus. Also controls highlighting of fastest laps etc in race result lists.
Button green:
Shade for 'green' buttons.
Button red:
Shade for 'red' buttons.
Button alternate:
Shade for buttons used to indicate that pressing the button has no effect, or if an alternate third colour is needed. For example when going to the track selection screen, as long as you don't select a different track than currently loaded, the OK button will have this colour.
Small map light:
Colour of the small track map, when drawn against a most likely dark background (used for example at in-car view if the car has a roof).
Small map dark:
Colour of the small track map, when drawn against a most likely light background (used for example at in-car view if the car has no roof, or for the TV camera view)
Car 1 lap ahead:
Colour of a car more than one lap ahead (on the small track map).
Car ahead:
Colour of a car ahead of you.
AI ahead:
Colour of an AI car ahead of you.
Own car:
Colour of your own car.
AI behind:
Colour of an AI car behind you.
Car behind:
Colour of a car behind you.
Car 1 lap behind:
Colour of a car more than one lap behind you.
Versenyző
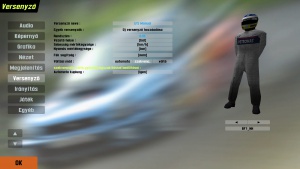
In this menu, details such as screen name, number plate text, etc. can be added. Here you can also select your driver, Male or Female, complete with helmet and racing suit and add to your car’s cockpit. Your selected screen name will always appear next to the player button, and you can also change helmet and helmet colors.
Versenyző neve:
A jelenlegi versenyző neve.
Egyéb versenyzők:
A jelenlegi versenyző mellett több versenyző is hozzáadható.
Rendszám:
A rendszámtáblán lévő szöveg.
Vezető helye: [bal / jobb]
A vezető helye az autóban.
Sebesség mértékegysége: [km/h / mph]
Nyomás mértékegysége: [bar / psi]
Fék segítség: [igen / nem]
Turns brake help on or off. If turned on, a very simple form of ABS tries to help keeping the car under control while braking, but it can increase the overall braking distance.
Váltási mód: [automata / szekvenciális / váltó]
Sets the shift mode. 'Auto' makes the computer change gears for you, which is good for beginners, but rather slow. 'Sequential' means you use paddles or a sequential gearstick and 'shifter' should be selected when you use a custom built shifter, or for example the one that comes with the Logitech G25 wheel.
Csak akkor elérhető, ha a 'szekvenciális' vagy a 'váltó' van kiválasztva:
Automata kuplung: [igen / nem]
Sets if the clutch should be operated automatically during shifting or if you have to do the footwork yourself. If you let the revs drop too low, the engine will stall. BMW Sauber is an exception to this, as it has a computer controlled clutch.
Irányítás
Egér/Billentyűzet
Keyboard steer: [Keyboard - no help / Keyboard - stabilised / Mouse steer]
This is how you select your input method:
- Keyboard - no help directly translates button presses into wheel movement. So long as the button is held down, the wheel will continue turning until it reaches maximum lock. There is an auto return to centre function when no steering keys are pressed. Both rates are configurable. Also, pressing both left and right will hold the wheel in its current position. This steering method is definitely not recommended, since it is impractically difficult to race with.
- Keyboard - stabilised has two main differences to "keyboard - no help". Firstly, it limits the movement of the wheel depending on the amount of grip the tyres have. This limit is also adjustable. Secondly it adds a small amount of automatic counter-steering to help balance the car. While this is a driving aid (and the turn limit can be considered one as well), it is essential for using such a basic input device for a task it obviously would never be used to do in real life. Thankfully the keyboard steering is highly configurable in LFS so you should be able to get it to work to your preference.
- Mouse steer (rather obviously) lets you use the mouse for steering and assign throttle and brake to buttons (be they on your keyboard or your mouse).
Auto gear shift: [Yes / No]
If enabled, the computer will change gear for you (and probably at the wrong time too).
Button control rate:
This is for when you assign a button to an analogue control (e.g. handbrake or clutch) how fast the control moves when the button is pressed. Higher is faster.
Mouse steer only:
Steer centre reduction:
This is a non-linearity slider and is designed to make it easier to control the car buy reducing straight line twitchyness. A setting of 0.0 gives fully linear steering whereas a setting of 1.0 gives fully non-linear steering. A setting of 0.4 to 0.6 is recommended.
Keyboard steer only:
Steer rate:
The speed the wheel turns when you press the left or right steer buttons. Higher values will make the car more responsive but less stable, and vice versa.
Return rate:
The speed the wheel turns when you depress the left or right steer buttons. Higher values will make the car more responsive but less stable, and vice versa. It is usual to use a lower value for the return rate, between 50 to 75% of the steer rate.
Fast steer multiplier:
When holding the "Steer Fast" key, the steer rate will be temporarily increased. This slider controls by what percentage it will be increased. With the default setting of 2.00, the steer rate will be doubled. This fast steering option can be useful when quick corrections are needed, such as when counter-steering. Chances are you're going to crash anyway so this option is of limited helpfulness.
Slow steer multiplier:
When holding the "Steer Slow" key, the steer rate will be temporarily reduced. This slider controls by what percentage it will be reduced. With the default setting of 0.50, the steer rate will be halved. This slow steering option is most useful at higher speeds when finer control over the vehicle is needed. However the keyboard steering is automatically speed sensitive, so there is really no need to ever use this anyway.
Limit multiplier: (Only available with 'Keyboard - stabilised')
A setting of 1.0 limits the wheel turn to that of the available grip of the tyres. Settings higher than this allow you to turn further, to induce understeer. Settings lower than 1.0 means you won't get so close to the limits of the car, so control is retained. The further you reduce this setting, the easier the car will be to drive, at the sacrifice of cornering speed.
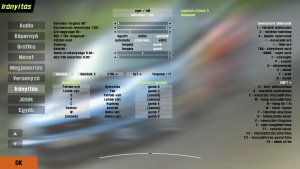
In the Buttons 1 subsection you select which button to assign to the function labelled to the right of the button. To choose and lock in your selection, simply click on the button to highlight it, a text message with instructions will appear at bottom of screen, Click desired button or key you wish to associate with this button etc. Do this for all Button 1 selections, then move on to Button 2 section using the same method to select and assign your desired keys or buttons to control the views etc.
When you have completed this, mouse users and keyboard users are finished, and may want to skip the section on wheels and joysticks. And go directly to the far right of this screen and look closely at the various key sequences and what they do. i.e. (Reserved keys) and Shift + combinations.
Kormány/Joystick
This section provides different options additional to the previous section. Existing keyboard and mouse settings can still be used just by clicking on the Mouse/KB button. This is useful if your wheel breaks or springs in pedal fall apart.
After selecting to enable your wheel you will need to set it up for maximum efficiency depending on the make and whether is has force feedback functions etc some options will not be needed or may be used if desired. Please note that you might have to change some settings in the drivers of your wheel manufacturer, e.g. to enable split axes.
Kormány forgása:
Adjusts the sensitivity of the virtual driver's animation when turning the virtual steering wheel. Set to the actual degrees of rotation of your steering wheel controller for best results.
Kormányzás linearitása:
Adjusts the turn ratio of the users wheel to the LFS car.
Erő nagysága:
For FF users, higher settings mean more feedback. Just try what suits best to you.
Gáz/fék tengelyek:
Can be one of three different states:
Együtt: The brake and throttle use the same axis
Külön: The brake and throttle use one axis each for their settings
Gombok: The brake and throttle use can be assigned to a button or a paddle
Váltási mód:
We have discussed earlier the three types and their use.
Kuplung és Kézifék:
Can be assigned to any spare axis or button if you wish.
Gomb érzékenysége:
Sets the sensitivity of the buttons when mapped to analog inputs. For example, the higher the rate, the faster the handbrake is applied when assigned to a button. Choose Display>Show pedals in order to see this option affect the speed at the which the handbrake (grey bar) is applied.
Gáz/fék linearitás:
Adjusts the sensitivity of the throttle and brake and the point at which it starts to apply.
Egy kormány beállítása
Ez az a hely, ahol a kormányt és joystickot használó versenyzők hozzárendelhetik a kontrollerükön található tengelyeket.
Győződj meg arról, hogy a felszerelésed csatlakoztatva van a géphez, a Windows felismerte a készüléket és a készülék be lett állítva a Windows "Control Panel / Game Controller" részében. Ha kell, indítsd el a kontroller szoftverét és ellenőrizd le ott is, hogy minden megfelelően működik (például a Logitechnek van ilyen "profilerje": Logitech Profiler). Először kalibráld be a Windows segítségével, mielőtt a LFS-ben próbálnád. A legújabb driverekkel és DirectX-el kell rendelkezned, vagy a kormány lehet hogy nem úgy fog működni, ahogy kéne.
- A gáz/fék tengelyeket állítsd "külön"-re, vagy "együtt"-re.
- (Lehetséges, hogy ezt a kontrollered szoftverében is be kell állítanod ahhoz, hogy működjön!)

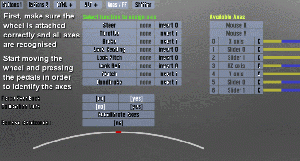
- In the middle of the screen a list of functions, and on the right a list of available axes will show up. Start rotating the wheel and pressing the pedals on your controller. If everything has been set up correctly so far, the blue/yellow bars on the far right will begin to move, representing the current controller input. If this is NOT the case, the fault is somewhere outside of LFS - see the "Before you start" section above.
- With the axes list still open, you can now start assigning the different functions to the available axes. To do this, first click on the function you want to assign (e.g. "Steer"), then click on the axis you want to assign it to (e.g. "X axis"). Unlike in many other games, pressing the pedal or rotating the wheel after clicking on the function button will NOT assign the axis automatically!
- After all necessary functions have been assigned, check if LFS reads the input correctly by rotating the wheel and pressing the pedals again. Now the steering indicator and pedal bars will move, too. If an axis/function operates the opposite way it should, click on the "invert" button found to the right of the function in question.
Játék
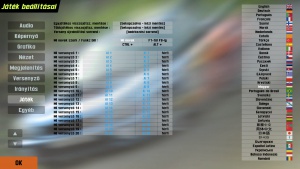
Here we set some minor options such as the automatic/manual saving of races, the finishing order for race restarts etc - We can substitute names for the AI, maybe we want to race against Peter Brock or Michael Schumacher? Just click to cycle through the available options of each selection. The most important feature however, is the ability to add to the F1 - F8 keys of your own custom messages, such as “Sorry”, Hello, etc for use when in game and too busy to type a reply etc. To do this, select the "F1 to F8" button and in the space next to the selected key, click to open, then type in your message text, click OK to save. There is a limit on length etc, but most short messages can be written.
On the right side of this page you can select the language used in LFS.
Egyjátékos visszajátszás mentése: [Not enabled / Enabled / Auto save]
Sets how replays should be handled. Not enabled means there are no replays recorded, ever. Enabled means replays are recorded, but you have to save them manually (ingame, hit "1" to save with automatically generated name, or hit "2" to save with custom name). Automatic means that every replay is saved with an automatically generated name, without requiring you to do anything.
Többjátékos visszajátszás mentése:
See single player replay save.
Versenyújraindítási sorrend:
Sets how race (re)starts that had no prior qualifying should be handled. The options are self explanatory.
MI nevek / Funkció-billentyűk szerkesztése:
- MI nevek: Self explanatory.
- F1-től F8-ig: Click on the spaces/buttons right to the desired key to define the text to say on hitting the corresponding key. The codes in there are the same as if hitting "T" (to talk) ingame.
- CTRL +: Same as behaviour as in "F1 to F8", but defines the actions when hitting CTRL plus the desired key at the same time. Additionally you have access to keys F9 - F12 here.
- ALT +: See 'CTRL +', but instead with the ALT key.
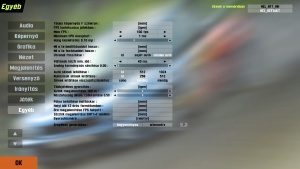
Egyéb
Itt több olyan beállítás található, amikkel javíthatod a játékélményt vagy akár a FPS-t.
Teljes képernyős V-szinkron: [igen / nem]
Bekapcsolja a VSync-et.
FPS korlátozása a játékban: [igen / nem]
Ha ez aktív, a következő beállítás alapján a játék korlátozza a FPS-t.
Max FPS:
Itt megadhatod, mennyi képkockát szeretnél látni másodperceként. Ha az előző beállítás nem aktív, akkor nem veszi figyelembe ezt az értéket. A FPS korlátozása megtakaríthat egy kis energiát és csökkenti a villanyszámlát is. :)
Minimum CPU üresjárat:
Ez az érték megadja, hogy mennyi időt hagyjon/várjon a LFS a képkockák között, hogy engedje a Windowst, hogy frissítse a bemeneti kontrollereket, stb. Emeld ezt az értéket, ha olyan problémáid vannak a kontrollereddel, mint például az akadozás, szaggatás vagy lag. Ne állítsd túl magasra, mert lehatárolja majd a maximum FPS-t.
Hang késleltetés:
A játéknak valós időben kell lejátszania a hangot, úgy, hogy nincsenek kisebb szünetek a hangok között. Az ajánlott beállítás a lehető legkisebb érték, amin nem hallasz akadozásokat és szüneteket a hangban.
MI a te beállításaidat használhatja: [igen / nem]
Nyilvánvaló.
MI a te festéseidet használhatja: [igen / nem]
Nyilvánvaló.
Útvonal frissítése: [ki / saját autó / minden autó]
Váltások közötti minimum idő:
Sets the time in milliseconds that must elapse before another (sequential) gear change is accepted. On some wheels when they get old, the paddles start to sometimes report two very quick presses instead of one. This setting tries to cure the annoying behaviour by ignoring quick shift commands. If you suffer from these so called double shifts, increase this value - if on the other hand you seem to miss gear shifts when quickly shifting yourself, decrease it.
Analóg kormányzás simítása:
Sets the amount of smoothing for joysticks and some wheels. The higher the value, the smoother your inputs will be, but they will also lag behind slightly.
Autó skinek letöltése: [ki / 512 / 1024]
Controls the automatic downloading of car skins for licensed users. The 1024 option requires you to have money credits on your Live For Speed account, and costs £1 for 2000 'hi-res' skins. If you run out of credit LFS will give a warning message, and then stop downloading skins. It will not resort to 512 mode. Default: 512
Bukósisak skinek letöltése: [ki / 256 / 512]
Controls the automatic downloading of helmet skins for licensed users. The 512 option requires you to have money credits on your Live For Speed account, and costs £1 for 2000 'hi-res' skins. If you run out of credit LFS will give a warning message, and then stop downloading skins. It will not resort to 256 mode. Default: 256
Skinek letöltése visszajátszásokhoz: [soha / kérdez / mindig]
Sets whether the program will never download skins in replay files, will prompt if you do not have the skin, or always download missing skins automatically. Default: Ask
Többjátékos gyorsítás: [igen / nem]
This option makes the distant cars use less CPU power by not updating their physics or drawing them at all.
Autók megjelenítése: (Only visible when 'Multiplayer speedup option' is enabled)
Sets the distance the cars are drawn. Use a lower value for better performance.
Részletesség dinamikus csökkentése:
Sets the value for the dynamic change of "Level of Detail". Zero means no, and one is full dynamic LOD reduction. This makes the Level of Detail change dynamically depending on how many cars are visible and on your current framerate. Use higher values if you experience slowdowns when multiple cars are visible.
Teljesítmény: 1.00 | Minőség: 0.00
Pálya betöltése indításkor: [igen / nem]
If disabled, the startup time of LFS will be considerably decreased.
Helyi idő 12 órás formátumban: [igen / nem]
Nyilvánvaló.
Óra megjelnítése FPS helyett: [igen / nem]
If on, the FPS display will be replaced with the local time.
Zászlók megjelenítése SHIFT+F módban: [igen / nem]
If enabled, blue and yellow flags are still displayed if the interface rendering has been disabled with Shift+F.
Gyorsulásmérő: [relatív / abszolút]
Árnyékok generálása: [hagyományos / alternatív]
Külső linkek
- Egyéni zene az LFS-ben leírás az RSC fórumokon (angol nyelvű)
